Thursday, December 27, 2012

Page 08-04 Build Time: 81 hrs
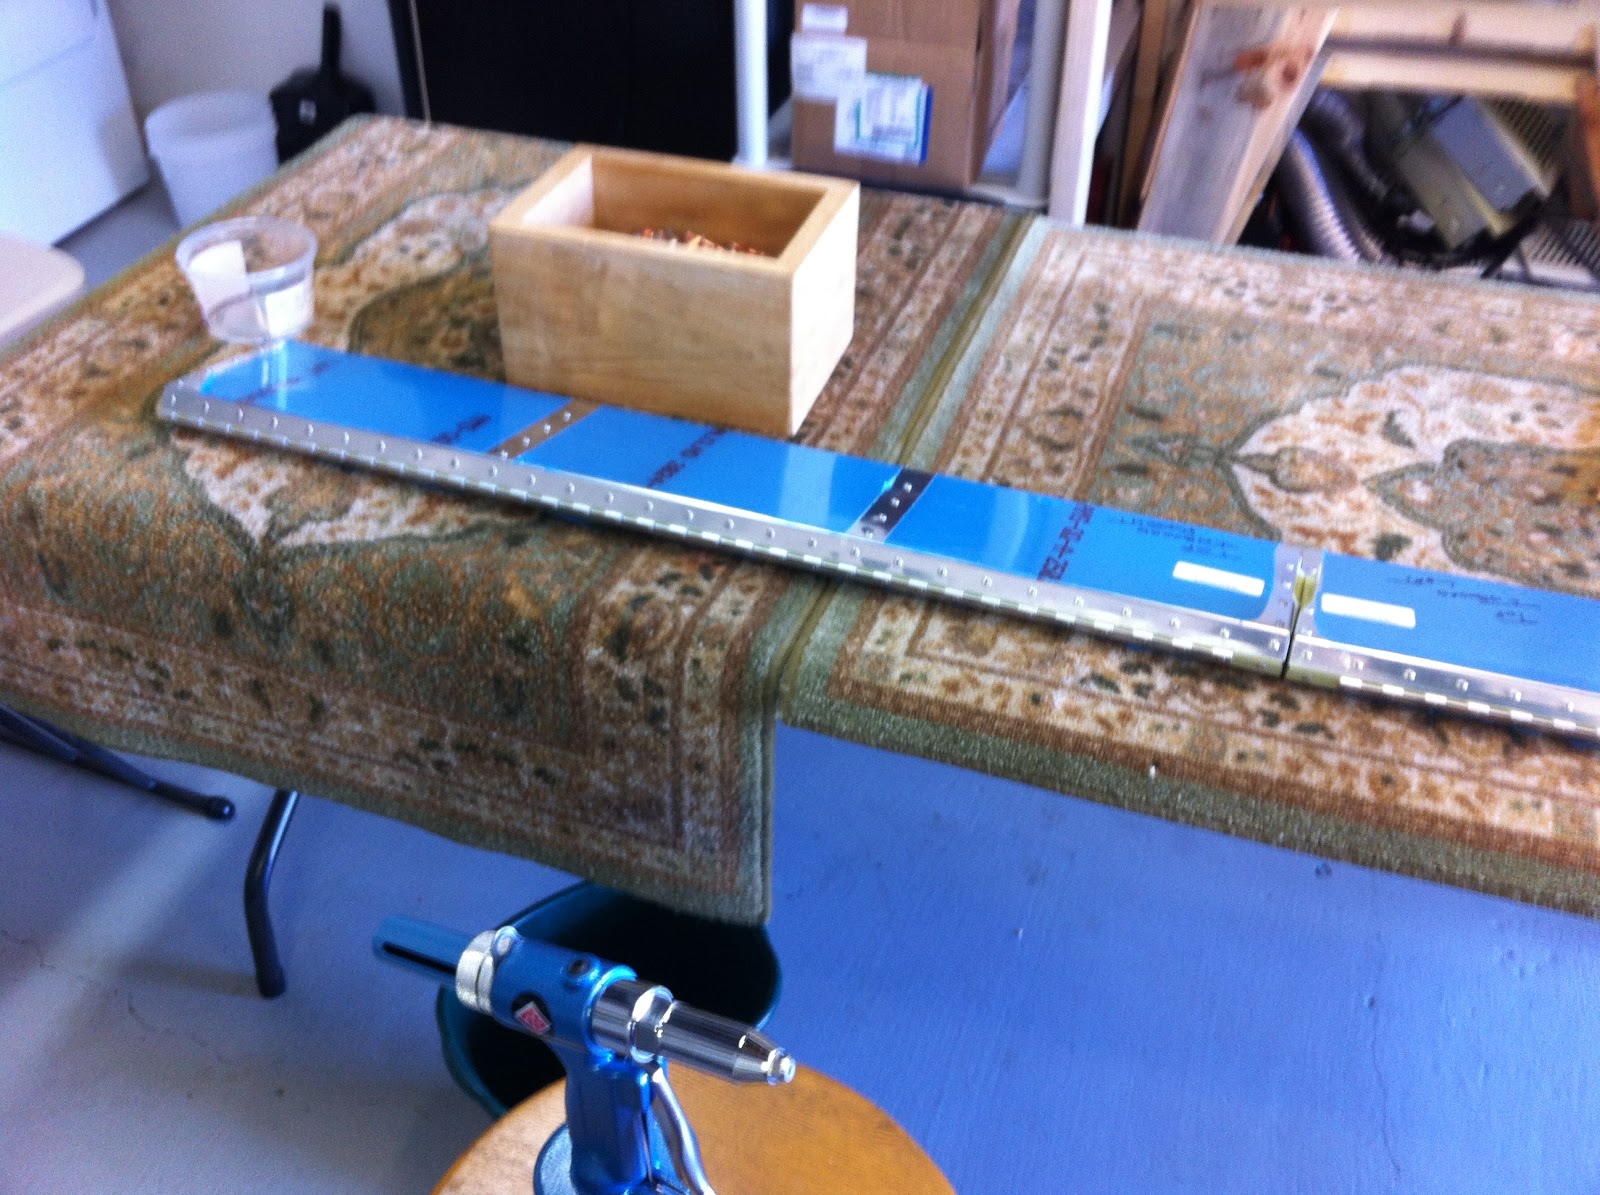
Anti-Servo Tabs Complete

Eleven hours in debur, scuff and prep for primer, four hours in primer (had to stop and prep the skin and hinge where they attach) and a lean four hours in assembly including drilling out the hinges. The 11 hours in debur included wrinkling one of the skins on the scotchbright wheel. I was looking for a efficient way to get through debur and the wheel caught the edge of the skin - ping! - and it was bent. I did my best to tap it out with a soft mallet but every time I closed my eyes I could see it. Since I was going up to Vans anyway I decided to call and see if they could hold one for me. No problem and it was only $24! I've paid over $70 for a 3X2 piece of FAA/PMA 30 year old aluminum for the Cessna. It's such a joy to work on a plane they actually still build!
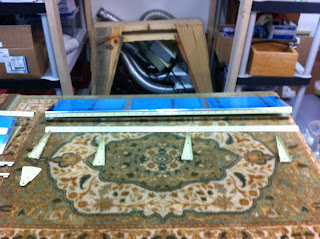
Bummer
I used the teflon wheel edge seamer on the skin edges where they attach to the spar. I was tempted to use it on the rudder and wish I would have but I had never used it before and I didn't feel like hacking off a good piece of 2024 just to try it. Now that I had an extra skin I could experiment. It turned out awesome! The book says be carful so I was. While getting a feel for it on the scrap part you could see how it nicely forms the metal. You can also work it back and the bend just disappears. The skins lay just right against the spar. I was mindful that this was very close to the rivet line so not too much. Just enough to make a difference.
Once assemble began it was pretty quick work to get the parts together. Drilling out the hinge was no big deal - just keep reminding yourself only the trailing holes and keep the jig with the notch at the hinge eyelet. Each new part has shown improvement both in technique and the finished product.
Even though the primer is an extra step I still believe it's the way to go. Total weight gain on the parts was 0.8 oz. I mixed up 4 oz of primer and catalyst and thinned it with about 0.5 oz. The last batch took 8 oz and I had to mix up a couple batches to get them all coated. I also remember the paint was splattering a bit and that's generally a sign of thick paint. The gun also needed a good cleaning so I went through it completely. The parts came out excellent (hate to throw out 2 oz of this stuff though) and next time I'm going to try to hit it even lighter. I'm looking for an almost translucent / perl look where the aluminum just peaks out from the primer. In any case, even thought the wing skins look daunting I'm committed on primer for all internal parts. The booth is working out fine also.
I have all four kits now, the main spars came today. I've spent a good 4 days in inventory and should be able to finish up tomorrow morning and then call Vans for the couple items that didn't show up. I also have one pretty nice scratch in a skin. I'll send them a picture and see what they say. I assume I'll just burnish it out. For those using blogs to get info on building I would have to say debur in critical. This is the craft in aircraft. If you look at the work Vans does on some of the parts you can see how much they do. It's a significant part of the process but very necessary. I'd also say that if you don't have the room just do a kit at a time. I chose to get all four because I will build this plane - not just the tail feathers.

On to the stabilator!

Sunday, December 23, 2012

The Trip to Vans
I decided to make the trip to Vans for the rest of the plane when I bought it. It's just up to OR so it seemed like a good idea. I knew they would have the kits ready in December but the west coast weather is such that I fly most of the year so I didn't believe weather would be much of a problem. When they called the weather wasn't too bad and there was a front moving in for the trip but the commitment was made, the trailer reserved and time taken off work, so I went. Turned out to be the blizzard of 2012 and the 9 to 10 hours up turned into a 20 hour drive. What was going to be a quick day up and a day back ended up to be 3 days - pretty much like everything else on this plane - just takes longer than you expect. Now that I'm home safe with $24k of parts I don't regret it but I won't make that trip again until the plane is flying and I can fly to Vans.

There are three mountain passes to get to the Portland area and all three were snowing. The first pass at Mt Shasta had us holding for three and a half hours at Dunsmire while wet sticky snow just piled up.
This put a huge dent in the travel time and I made it as far as Eugene at 3:00AM, pulled in and got a room. After three hours sleep I hit the road because I wanted to make it back down to the passed before night. Vans was cool. Took a quick look around the place and loaded up the truck.
Inside of Vans

If I ever do build again the quick builds seem the way to go. You can unpack the fuselage and make airplane noises the day they deliver. I also saw a 12 that was pretty much complete off to the side. It had some wrinkles in the empennage skins. I don't know if it's the one that I read about on VansAirforce, (I hope it's not a common problem - search thin skinned bird) but Vans was committed to figuring it out. I cleco every hole and work my way out from the center they way I was taught. Aluminum does stretch and when you use a gun you really see it. So the truck is all loaded for the trip home and off we go.
The Photo Op
They had already scheduled the main spars for the shipper and we could have thrown them on top but there was no need to push the envelope. It was bad weather for the trip home and forecasted to get worse so let the professionals deal with the snowy roads.
I made good time back down to Medford - Grants Pass was a non-issue. Snow but no chains required. At Ashland they had us waiting again and reports were that the CA-CHP had closed I5 for an accident. It was only 3PM and I knew if I could get out of the passed by 6 or 7 I'd be fine. Well it didn't quit work out that way. They shut down the passes at Yreaka for blizzard conditions and made us all get off the freeway. I thought about waiting it out in the truck but decided to be conservative (as any good pilot should) and not let get-there-itis cloud my decisions. I'd only had 3 hours sleep in the last two days and had precious cargo so I drove back up to Medford and got a room. Turned out that everything opened up again at 8:30 PM but I had the room so I just decided to keep it on the ground and get some rest. I hit the road again at 4AM in hope of beating the mad rush of traffic that was sure to come when all the rest of the folks got back on the highway - a good decision. Chained up at Syskiyou pass (truck, trailer and used 4 wheel drive) and it was pretty much a none event. The rest of the passes were easy. I kept the chains on the trailer (cables actually - there on and off in 3 minutes) and kept it in 4X4 for the rest of the trip. A note to anyone driving in this weather. It's better to drive 30 mph than 0 mph. Every pass had an accident. From jack-knifed big rigs to overturned SUV's. 
One last pass to the flatlands


Santa's Sleigh out making rounds (guess I wasn't naughty this year!)
Home at last after the trip to the North Pole.
Says do not open till Christmas but I need to get some room in the shop.

So Merry Christmas everyone - Be safe out there! Time to spend the day with the inventory sheets.

Saturday, December 15, 2012

Page 07-05 Build Time: 62 hrs
Rudder complete


Finished the rudder this weekend. Was hoping for faster progress but between riveting and re-reviting (and drilling out rivets) and test fitting the rudder to the vstab the time just added up. After drilling out the first three rivets I've moved onto using the rivet gun. There's no point in not using the correct tools for the job. I'm sure plenty have used squeezers to complete the project but the gun produces superior results. I wasn't satisfied with the shop head using the squeezer. I had to take some time to practice on a few pieces of scrap but once I got started I could set the head to spec in one shot.

I also can't say enough about the pneumatic puller. I can't imagine doing this without it although I've read plenty of blogs where people are trying. The tool produces consistent results every time.


Vans called this week and the finish, wings and fuselage kits are ready. I'll drive up and pick them up next week and take the tour. I'll have the wing spars shipped since my truck won't hold anything that long. It was part of the plan to make the pilgrimage so I'll follow through with but I will loose a day of build time driving up and back. It will be a struggle to fit this stuff in the shop while I'm building but I'll have to make it work.

Sunday, December 9, 2012

Page 06-07 Build Time: 54 hrs
Vertical Stab Complete

Took a total of 7 hours to assemble the V-Stab. I thought it would go a little faster but there's still the aspect of getting all the little bits together and making sure you have all the right screws, bolts and washers.
While assembling the VS skeleton I noticed that rib VS-1207 had it's two forward holes drilled for #40 so I drilled them out for #30. The primer came out very nice. No big deal on the thickness as weight was not a problem. The total added weight for the VS from primer was 2.6 oz. Total added weight of the rudder is 2.2 oz

I test fit the ribs to the skin that needed radius and took a little extra off just for good measure. After cleco everything looked fine. I started riveting one side and about half way through I decided to start down the other side. I started at the holes that were at the tips of the spar and ribs where the radius was and as soon as I pulled a rivet over the front spar I saw a little bulge. So I hit all three spots with one rivet to see how bad it was. It wasn't that bad and in hind sight part of the bulge may have been from test fitting it before but I couldn't live with it. So out came all the clecos from that side and I carefully drilled out the rivet. Then I had to open up the skin and gently shave back the front spar and a bit on one of the ribs. I could see I made a difference so I clecoed everything up and it looked good. I inspected the area and could tell that the front spar was no longer in the area where it had bulged so back to riveting.
I can't say enough about this primer. It's a lot of work but the parts look excellent. In just one day it's hard as nails. It makes for a very professional job.

Here's a shot of the skeleton going into the skin.. just like the book!
And of course we need a pic of the very first rivet. The pneumatic puller I have is excellent and makes quick work of getting the rivet in.

Saturday, December 8, 2012

Page 07-04 Build Time: 47 hrs

Spent the day getting the VS skin and all the rudder parts through primer. I spent quite a bit of time setting up a paint booth and making sure no over spray would make it's way around the shop. The booth is small but it seems to do all right.

I'm using four exhaust fans which comes to 200 CFM. It seems to do the trick. It doesn't keep the smell down too much since I'm always in and out of the booth but I didn't see any paint outside of the booth (the bike wasn't in the shop while I was painting in case anyone wondered).

The finished product looks nice. I noticed more paint this time which is odd. The first time I was outside and actually working in the dark and the parts came out excellent. Now I have plenty of light and it's going on heavy. I'm still weighing pre and post so we'll see what the difference is tomorrow after they've had a chance to cure.

It's pretty hard getting into all the litter corners with the gun.
I finally have enough parts to start assembly. I think it will go together quickly now. No debuting, no drilling just put it together and be carful to follow the directions so I only have to assemble it once.
I expect to make good progress tomorrow but I do have to take a look at the Cessna and if it needs more attention that may eat away the day.


Monday, December 3, 2012

Page 07-04 Build Time: 43 hrs

Spent a solid day yesterday getting the rudder to primer. Match drill the spar caps. Final drill the hinges. Trim one rib and de-bur all edges. I have my scotch brit wheel on my grinder now and it's a huge time saver - especially for trimming down the cut parts. I'm still very carful about getting a nice edge on the skins. I imagine most people don't take the time to get the skins butter smooth but they do have quite a few tool marks so I spend the time. It's therapy.

Scuffed and washed all parts and they're ready for primer. I weighed the first parts though primer and it was tenths of an ounce, (one tenth - sometimes it just didn't register). I was concerned about putting it on too thick but it looks like it's going to be fine. This primer is quite a bit more work but I do believe it's worth it - especially for me. At KPAO the field is located where they make salt. It won't be there permanently but my Cessna stays there long enough to warrant considering a paint job. It really raises hell with the paint. The home base for the Cessna is KCCR which is often down wind of all the refineries. If you know your corrosion factors then you know this is also a highly corrosive environment. I'm on the waiting list for a hanger at C83. If that comes through in a couple years I'm sure that's where I'll keep it. Until then, it will be at KCCR gathering the yellow spots from the neighbors.

No pics this time - not much to show. Did manage to get a paint booth together and I'm looking forward to taking the pain out of priming so I can pull some rivets. Speaking of rivets - I did set the VS bearing rivets with my squeezer. It took quite a bit to get a 1/8 shop head to spec. I'm good with a gun but prefer the squeezer if it's not too much work. I may just use the gun going forward but it requires a couple practice rivets before you put hammer to metal.

Sunday, November 25, 2012

Page 06-06 Build Time: 36 hrs

The goal for the holiday weekend was to get the Vertical Stab through primer so that it could cure during the week and be ready for assembly next week. I completed all the de-burring for the VS skeleton as well as scuffed them up to get ready for paint. I've dimpled the skins for the VS de-burred and scuffed for paint as well. I test fit the ribs that need radius so there won't be any O-shit moments post primer.


The process I'm using for prep is a very fine (red) scotch-brite followed by the ultra fine (silver) just to knock down some of the scuff from the red one. Not too much but enough to give the aluminum some "tooth" as they say. This is followed by a wash with Dawn to remove most of the dirt then Acryli-Clean until no more black comes up. Prior to primer there's one last quick cleaning to pick up any dust of finger prints. I don't want to go the Alumni-Prep / Alodine route as it's just too much prep and the primer I'm using should be fine without it. The outside will have the full treatment but that won't be done by me.

I've given this primer business quite a bit of thought. After speaking with a couple people in the business that I trust I ended up with Sherwin Williams corrosion resistant epoxy primer. While talking with the painter I asked about the water based stuff I had previously decided to use (I only bought a quart) and he felt that if you could still get the good stuff you should use it. I have to say - primer adds a significant amount of time to the build. I'm sure as I get settled on the process it won't be so bad but I could be quite a bit farther along if I just built without primer.

I mixed the primer (turned out to be exactly the right amount) but ran out of time / temperature before I could get to the VS skin. So that will have to wait till next week. I wanted to see how this primer was going to turn out - it's hella more work in prep, cleanup and logistics. I'm going to look into doing it in a shop locally so that I have a bit more control on the process. I also weighed each part going into primer and will re-weigh once it's cured. I want to track the ratio so I can get an idea if I'm really putting on the pounds with internal primer.

Primer is a all day event. I thought I could take on the intake gaskets for the Cessna and the primer in one day but it was a grind getting it all done. Going forward I'll leave the entire day for it. I'm very pleased with the results but it makes everything much more work in terms of prep and mocking up without actually assembling anything.


Monday, November 19, 2012

Page 06-03 - Build Time: 14 Hrs

Spent a full day getting the shop cleaned out so I had room to work. So this weeks time was pretty much dedicated to that. Here's a look at the room I have now. I have the next three kits on order and I'm hoping they will fit. I imagine there will be lot's of stuff hanging from the rafters.

My First Porcupine.
Found some time Sunday night to drill out the spar caps for the VS. Finally got to use some of those clecos.

Monday, November 12, 2012

Page 06-02 - Build Time: 10 hrs

Finally building an airplane. Built out the Rudder Bering attachments less the riveting. That will come post primer. Ah, primer. Yes there will be primer.

I've settled on Stewart Systems because it cleans up with water and it's touted a less toxic. I spoke to one of the guys at Stewart and he felt that unless your less than 50 miles from the ocean don't bother with the inside - and I would agree. I'm around 30 miles from the real salty stuff. I've decided to use primer sealer on the ribs and the epoxy based on anything that isn't aclad. I'll use the epoxy on the inside of the fuselage to protect from fluids.

I took on the rear spar caps and those are ready for match drilling. I also took on a bit of de-burring on the mid ribs and front spar. Removed the material as noted in the build book. I really do like working with aluminum because it's so pliable. It's great to sit in the shop and craft each part thinking of how early pioneers of flight took on building their machines a part at a time.
The tools are working out. I'm very happy to have a chance to use the stuff I've been accumulating since A&P school. The right tool makes all the difference.


Saturday, November 3, 2012

Build Time: 6 hrs.

Spent some time today reading the build docs, reading more primer wars and peeling off the blue plastic. It's interesting how much weight that stuff adds to a part. Vans says get it off quickly and as much as I like knowing it's protecting my shinny aluminum soon I'll be scuffing it up for paint.

Friday, November 2, 2012

Santa Drives a Kenworth!

The empennage kit came today. The driver called and asked if there was enough room on the street for a forty five footer and I said sure without even thinking about it. When he came up the street I though no problem on the sides but he came close the the power lines! The box had some damage so the driver helped me open it up and pull enough out to make sure no skins were damaged. Vans does a great job of packing. I spent the rest of the day pulling everything out and doing the inventory. Only one part missing - a small plastic grommet that should have been in with the wire ties. Everything else was there including TEN THOUSAND pull rivets. I'll spend the rest of the weekend reading through the plans and taking care of other chores.

Besides being really excited about building an airplane I'm very impressed with the kit. The plans look to be top notch. I'm still on the fence about primer during the build. I have a 35 year old Cessna that grew up in FL and now lives in the SF bay area. It's had Corrosion X treatments most of it's life and has held up well. The bay area does take it's toll on the paint but the inside is in good shape for it's age. I doubt that primer on this plane would have made a difference in the areas that are problematic.

Monday, October 22, 2012

Well this is where it starts, Step 1 - sign the check. This certainly must be the hardest part of the build.

I've been thinking about building this plane for years. I met Mr RV himself at AOPA in KPSP and sat in the 12 they are marketing for the SLSA program. I'm hooked. There's a few years of fun, challenges, pride and at some point flying my creation ahead of me -  just like the earliest pioneers of flight.