Sunday, June 4, 2017

The RV Grin

First flight today. The plane flew perfectly. It was hands off level and no yaw. I flew a factory 12 with an instructor in the morning and when we taxied off he said I had a good feel for the plane and to go ahead and fly mine... so I did. Flew off card 1 with no problems so far. I'll leak check it in the morning and take it out again for some slow flight and stalls before I move onto card 2. Very happy with how it turned out and extremely happy with the response of the 12.
One of the coolest things about flying this plane is the view. Amazing!

The RV Grin

Saturday, May 27, 2017

Experimental RV696VA Cleared for Takeoff

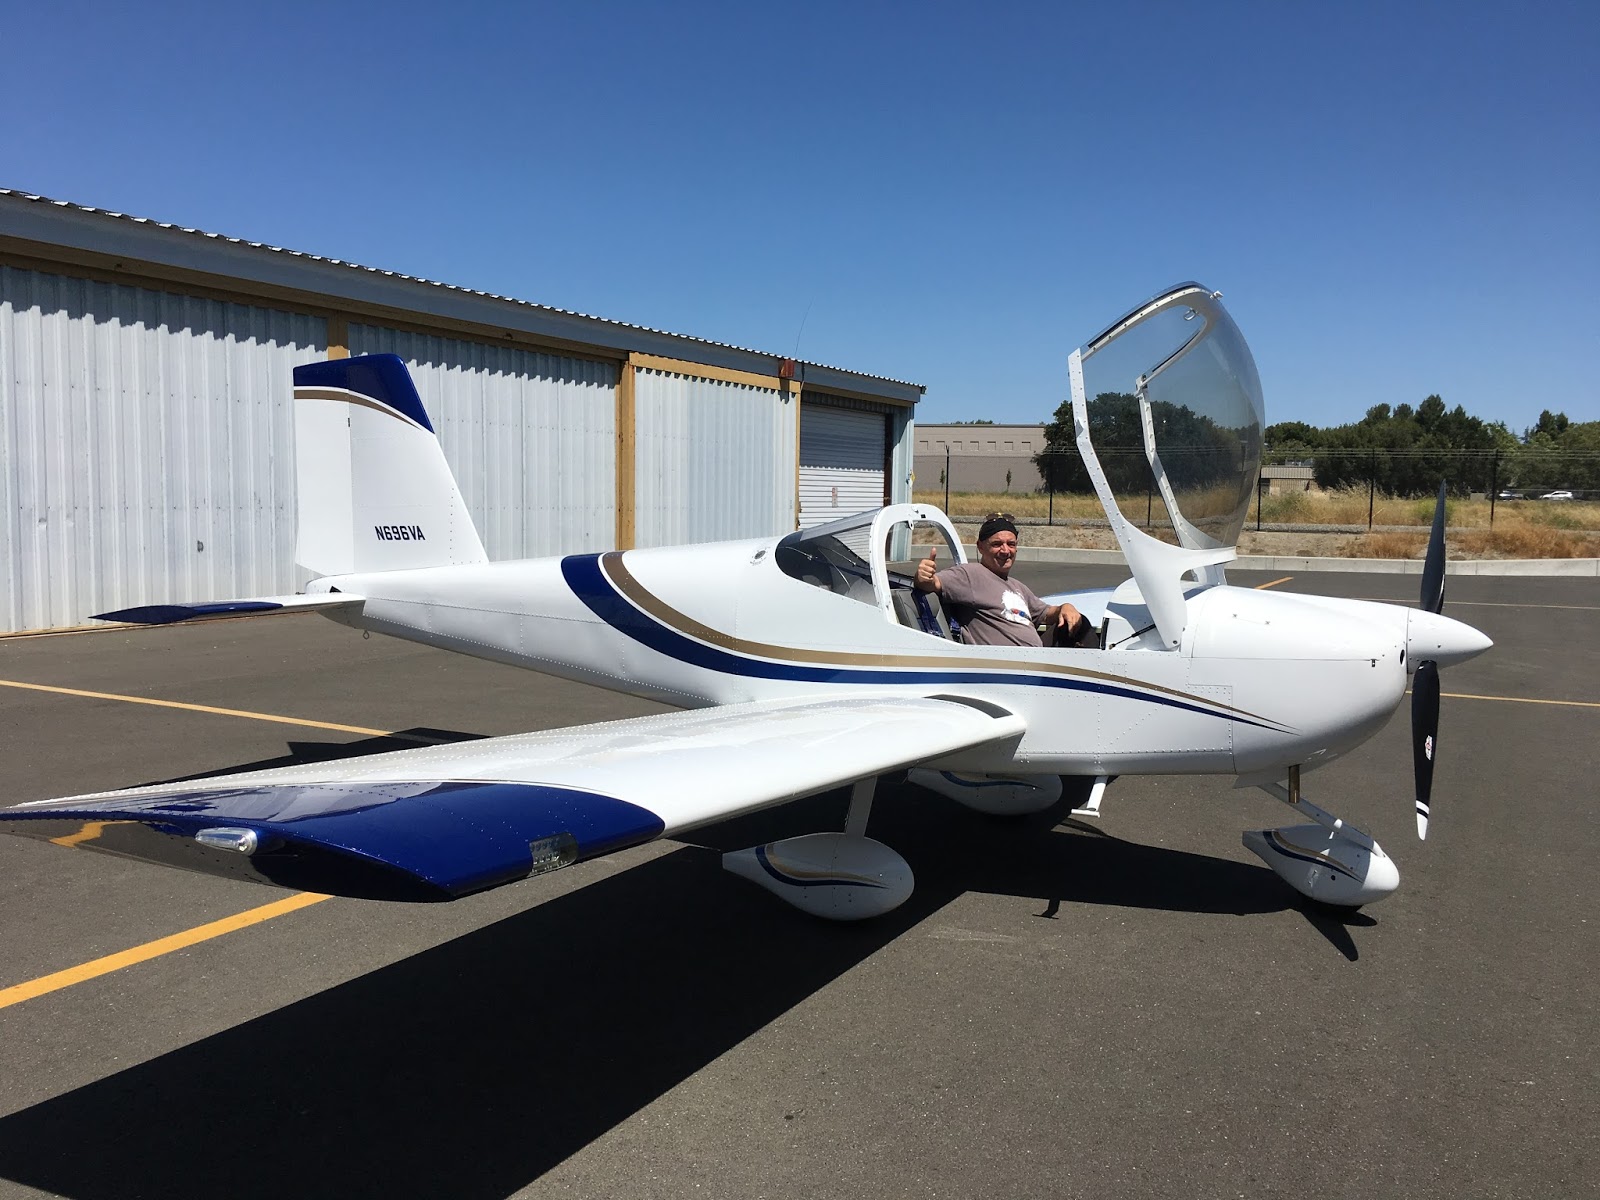
The project is an airplane now. The Airworthiness Certificate was issued May 26th, 2017. The DAR was a very nice person and the entire inspection was a non-event. I stressed a bit about registration and certification but it was just the unknown. I knew I'd figure it out when the time came and it really was simple. Two weeks to get the registration in the mail and four days notice to the DAR to come by and inspect the plane.

It's a big step going from project to plane, somewhat melancholy. I know I built it to fly but building it was all I have done for the last four and a half years. There's still stuff to fiddle with - and lots of stuff to learn about it - and of course phase 1 flight testing.

So this should be the last entry to the building of my RV-12. Thanks to all who found this interesting.

New builders who might find this blog useful should note - there's not too much info on mistakes. I made them, tore it apart and fixed them. You will make them. So please, take it apart and do it right.

And finally:
If I had to do it over again...
For the RV-12, no EAB. It's not worth it. Literally any thing you do outside of VANS design will have consequences that only come out in CAD. And if you venture too far out on the EAB limb well - you're on your own.

Primer war comment - having used epoxy primer on the inside of the plane I would not recommend any primer. Most of these planes will outlive the builder or second and possible subsequent owners. It adds weight, adds significant time and messing with paints like this will kill you if you don't respect them.

Still a ways to go before I actually fly it but it is airworthy and I'm sure will be in the air within a week.

Signing off
jimsrv


Sunday, April 30, 2017

Everything in place - build time 1804 hrs

It's time to get the plane on the scales and see what it came in at. I expect it to be a bit heavy due to the primer and I installed every option. Already had an offer on it. I've been in touch with the DAR and he says give him a week lead time and he will come out. I have about 2 weeks of squaks and finish work and I plan on going through the PAP before I call him.


Thursday, March 30, 2017

The Final Chapter

After some 60 or so build chapters I have finally completed the final chapter - installing the control cables. This marks the official milestone that delineates between stuff that hasn't been addressed and going over previous chapters and finishing what needs to be done. Next up is to put the prop back on and get the engine fired up. There's a few weeks of going back over the build book and addressing things I've left until this point but it's moving along.
Within the next couple weeks I'll head over for a few hours transition training in an RV12. I've flown one for an hour already and there's no surprises but since I'll be taking it up for the first time myself and to keep the insurance happy training is in order.
The Skyview is impressive.
d
I'll change how I've tied down these cables next time I go to the airport.

Friday, March 3, 2017

Final Assembly - build time 1696 hrs

Down the final stretch now - putting it all together. This is really fun and while I now have to drive to the airport to work on the plane it's great to hang out and talk with folks that come by to see the project.
First thing I'm working on is getting the panel complete so I can get the systems working. The right panel has been reworked 6 times now - 3 for the gloss black and 3 times with the carbon fiber vinyl.
The original plan of using the gloss black was a good plan but it's really hard to paint that color and get it to look good. The radio stack needed to be refinished after cutting the holes for the auto pilot heads and enlarging the hole for the radio and the left panel came with the sky view and didn't have the intercom cutout so it needed to be finished. At this point I decided to try the vinyl and went ahead and bought $50 worth of it.
I'm really happy with how it turned out. I started with the right panel. For the first shot I tried to start at one edge and pull it on. It stretched and caused wrinkles so that method was out. It will stretch a bit but it's not that flexible. The second attempt went well. I let it warm a bit and placed it on a soft rubber mat and then just stamped the panel into it. That worked very well. I moved onto the radio panel and that came out pretty good but the lines in the pattern were a bit off. I could have lived with it though. Next was the left panel and I was getting pretty good at lining things up by now. That came out nice enough to cause me to take another shot at the right panel. If I had not had enough material I would have left it alone but I had just enough to try it one more time. It came out really nice and I'm glad I did it.
I plan on making sure the power is at the correct pins before I apply any power to any avionics. I expect to have power in the plane within the next couple of days.
Next week I'll be headed down to Chino for the Rotax service and maintenance classes, not cheap, but I always planned on taking these classes. I expect to have the engine running before the end of the month.


Tuesday, February 7, 2017

Painting Complete

After a couple months the plane is now painted. The final stretch for final assembly and airworthiness inspection is insight. The painting took about the time I expected - at least 8 weeks or better. It was a side job for my painter so he fit it in when he could. That coupled with more rain than expected added up to nearly 12 weeks. But it's done now and it looks great. I went down to the shop to approve the layout but really Jaun is the artist and he had a vision. Can't wait to start putting it all together and fire it up. In the time the plane was away I took a small break - it's been 4+ years that I've really focused at on working on this project and the break felt good. I'm a little behind on what I had hoped to accomplish during it's absents but it will all get done at some point. I'm nearly finished with the tank and just need to seal the top of it along with a few nutplates on the filler tube. I've ordered some carbon fiber vinyl for the panel. I had painted it gloss black but it just isn't worth the effort as I have to redo two of the three panels and gloss black is the absolute hardest to work with.


The white did a good job of hiding the bulkheads in the skin. Nearly every RV12 I've seen has this. Vans says it due to the thin skins.


Sunday, November 13, 2016

Off to the paint shop

Baby Bird made its first big move today - 150 miles to the paint shop. Once it's painted it will be final assembly, finish the avionics, run the engine and work through certification with the FAA. Juan at T&P aero seemed to want to get started first thing so it may be only a few weeks until it's painted. I have several small jobs and one last big job, the fuel tank, that will keep me busy while it's in the shop.