Saturday, May 4, 2013

Page 13-01 Build Time: 249 hrs
Moving on to the wings

Made the decision to move onto the wings. There's still sections 11 (servo) and section 12 (the fairing) to complete but I didn't want to go through the trouble of assembling the rudder and stabalator and then taking it all apart again for storage. I'm pretty sure you would still take it all apart for attachment to the fuselage in any case (I believe I read that). In any case I pulled the wing kit down and put the empanage up in it's place - see ya next year mr. fuse.

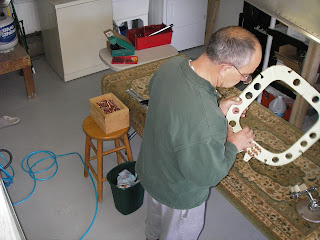
I've been eyeing the wing ribs and all that deburring but once I pulled them down and started examining them they should be pretty quick on the scotch bright wheel. They only have a shallow scallop to them and I can generally just run them down the edge of the wheel then catch the burr. They are pretty rough so it will take some time. Those parts are a couple sections away. First thing is to get the spars down from the rafters. That was a pretty big job getting them up there by myself and I'll find some help to get them down. 

Monday, April 22, 2013

Page 10-12 Build Time: 249 hrs
Section 10 Complete!

Well this section started at the end of January per my log book. Finally finished it up yesterday. It's been a long haul and I inventoried the last parts for section 11 (assembly) and 12 (fairings) thinking that I was done looking at this for a while and it's time to move onto the wings. I still may do that as it will all have to come apart for storage but their is quite a bit of work in those two sections. Everything turned out pretty nice. There are a couple sections at the frames where you can tell the skin is under compression and not tension. I called Van's and the response was don't worry about it. While I was making my way up the sides I noticed an area near the aft frame that felt soft. I could pick the empenage up by the rear bulkhead and put a little twist in it and see it go away. So I decided to cleco the top skin on and see if that helped and it did. That area looks fine now (still a bit soft) but I'm good with it. I tried to take out the rivets on the frame to unload it a bit but it quickly became apparent that removing the rivets would cause more problems than there were to solve. The area that is the worst offender now is at the front frame and from Vans and the websites everyone says that will come out when you attach. I do believe the frame is short and a shim would push it out but I'll decide that another day. I'm happy to have this much airplane in the shop and it's starting to attract the neighbors wanting to know if I'm really building an airplane at the house.
Building up the skins after righting the frames
A shot everyone seems to want to post - down the tunnel.
Every cleco I own - bought another hundred before assembly
You can see some of the ripple at the forward frame. Most of it came out after riveting it together.
Time to sit back and admire this for a couple weeks.


Tuesday, April 2, 2013

Page 10-04 Build Time: 228 hrs

This weekend I managed to get the tail cone skins through primer. It was every bit the PIA I expected it to be. Getting seven foot skins in a five foot booth was a lot of work in flipping wet skins, turning them around, trying to handle them without touching the paint and hanging them up to dry. I must say, if I didn't live near the coast I would not prime. But I do and after an eight hour day in a respirator, a couple beers and a nap the skins look awesome.


I've been weighing each part pre / post primer to try to assess the overall gain but these were too big to put on the scale. Also there's quite a bit of overspray on the plastic that will come off and not count in total weight. Total paint used in this session was 24 oz. This is the most I've used so far. I mix 8 oz at a time and clean the gun after 8 oz. It takes a couple hours to get through one cycle.


With the parts dry enough to work with the next day I couldn't resist some assembly. I had planned on flying but thunder storms were predidted and there's no way I'm going out in that. As it turned out there was a area warning for hail which is rare here in CA. Better to be on the ground wishing you were flying as they say.


I was pretty surprised by how much the sides of the bottom had to be pulled in with clecos. I checked and double checked but they were the right parts in the right direction so I let the clecos do the work. You really want to work this slowly and not stress any one section. Once Aluminum stretches  it's pretty hard to shrink it back but it all came out very nice. I also noticed that placing the saw horses where the plans tell you to loaded the center section of the skin. This caused some small allignment issues but once I move the saw horse behind the forward frame everything relaxed and the fit was fine.
I'm watching this area closely since a couple of 12's have had wrinkling in this section. One of them was at Vans when I picked up my kits. I'm hoping it's just assembly loading and I can avoid it by keeping the skins well supported without any stress.

Bottom tail cone coming together


 While setting up for scuff I loosely assembled the skins so I could mask off the areas beyond the overlap. In one section I noticed the holes weren't lining up. The error is only 1/32 but it sets about a dozen holes off by that much. I have it flagged and will contact Vans if it's still a problem during final assembly.

Glad to see some big parts coming together... Finally.

Sunday, March 24, 2013

Page 10-04 Build Time: 216 hrs

Finally got to put some parts together. I finished off the tail cone frames and the rear bulkhead. All the skins are scuffed, cleaned and ready for primer. It's pretty cool to see these parts go together. I've been staring at them for nearly two months. In a couple weeks I'll be hanging the skins on the frames and making big parts out of little parts.
Ready to spray primer
Rear bulkhead with the main squeeze
Everything goes pretty quick once the parts are ready to assemble

Rear bulkhead ready to dry fit to the stabilizer


Sunday, March 17, 2013

Page 10-04 Build Time: 196 hrs

Managed to get in a solid 8 hours this weekend. I have all the parts for the tail cone ready for the final cleaning and then into primer. I still need to scuff and clean the skins but I've decided to go ahead and prime everything but the skins in the next session. Between final cleaning, setting up and cleanup afterward that will take most of a day. Once those parts are done I'll assemble the frames and rear bulkhead and then move to the skins.

It's hard to believe I started this section in Jan and now we're looking at the backend of March but the Cessna's annual and school took up a lot of weekends. Pretty much every weekend I've found time for both the RV and the Cessna (there's always something to work on) but both have to take a back seat to studying or there's no point to going to school.


It's bee a long haul to get to this point. The skins were a lot of work until I finally got the die grinder and some red scotch brit 2 inch pads - that knocked it down quite a bit. Once these parts are primed and assembled as far as can be I'll get back the final scuff and cleaning of the skins.

Friday, March 1, 2013

Page 10-02 Build Time: 182 hrs

Still working on the tail cone. I have all the skins ready for scuff and prime. They've been fitted I used the teflon roller tool to break the edges. I'll finish the frames this weekend and the rear bulkhead will get me back to fab and ready for primer. February was a slow month as the annual is due on the Cessna and that took a couple weekends to iron out the squawks and complete. 

The parts in the foreground are done, the ones at the other end are all that's left to deburr. I'm making good use of the right angle die grinder and accessories. I would recommend this as the first purchase for deburring but all of the tools see a fair amount of use. 


This is the result of too much money and not enough time. But it makes getting through deburring much faster. I started out with just the files and the edge tool. Those rarely get used now. I'm still using the small files around the small areas on the edges. If you can see it, there's a drill bit meant for a CNC machine that I use for deburring drilled holes. It works much better than the deburr tool I bought (I use that to finish off counter sinks now) and then nice thing about this bit is it stays sharp and the shank is smooth. Using a bit with it's flutes is pretty hard on the fingers.

Sunday, February 3, 2013

Page 010-02 Build Time: 167 hrs

Not much to report. Deburring the tail cone skins. I only have the top skin left. I started out with my standard method, file, shave the burr left by the file with the deburr tool and smooth it out with some aluminum oxide. Each skin was running about 2 hours including removing the plastic. Three weekends into it and I went down and bought a 1/4 inch right angle die grinder and some 2 inch red scotch bright pads at the local auto paint store. What a difference. Cut the time down by half. I still have to be carful to make sure the rotation of the pad is always leaving the skin so I don't hook it and cause a bend but so far, so good. I'm still using the file as a first step because I want to take out the burrs left by the sheer but I do have a couple pads that look to be the next more abrasive size and may try to see how that works on an edge. I don't want to take a chance on the 0.020 skins though since they're so thin and shipping a nine foot skin won't be cheap.
No pics this time but I should be into the frames next week and then onto the aft bulkhead. Grinding away!