Friday, December 25, 2015

Fairings Complete - Beginning the Canopy - build time 1314 hrs

     Finally finished with the wheel fairings. They took so long to complete because I had to jump around and deal with rigging the wings which meant they were coming out of the living room for the last time. I'm pretty happy with the fairings - it just takes time and a lot of sanding, install, check uninstall, sand...
     I also had to deal with the brakes which took a solid session. Both calipers were leaking at the pipe fitting. I used the same pipe sealer I've been using for years and used on the master cylinders (which didn't leak) but I think what happened is I just over thought the whole thing and didn't tighten them enough. I bought some Locktite 561 (I think that's the number) and they're pretty tight now. Also had a leak at the right Main Gear bracket where the brake line goes through it. Other that getting 5606 all over the place it wasn't too hard to fix. Again, I think I just didn't get them tight enough. I haven't pressure tested the brakes yet and I'll do that at some point when I get around to bleeding them again.

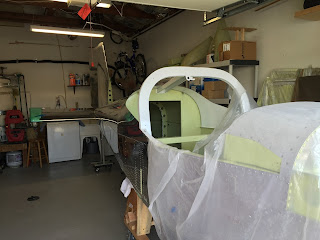
    The canopy is coming along. It seemed daunting at first but I watched the video on vans web of the RV14 layup and that instilled confidence. Also, most of the forum says it's no big deal. I've done layups with glass before and other than the mess it should be fine. For those that find these blogs helpful here's a tip. The construction manual says to sand or file the weld in the middle of the forward tube and then install the canopy frame and check for clearance of the tube to the instrument panel. Then says to carefully bend to meet spec. Well, I had about 3/8's to pull forward and I couldn't get it to move while in the down position as it ran into the panel. So I opened it and 'carefully' pulled down and heard a 'pop' - the weld in the middle of the tub where I filed it down cracked. So to future builder - sand / file the weld after you have the frame where you want it. It will be simple to fix but I'll have to truck it over to someone with a tig that can weld 6061.

    It took some time to prep the canopy. The hole for the latch is already there and the edges looked pretty good but after closer inspection I felt they needed to be dressed per section 5 so I tapped it all up, hit it with 80 grit to even it out and then 260 to finish it up. Happy with the edge and may pull the aft window out and touch it up.

Finally have the frame attached. It will go on and off many times before it's completed.
DOH! Don't dwell on it. Fix it and move on.
Getting this on and off by myself is a challenge. I'm keeping the shop nice and warm so it doesn't crack.
The Aft gap should be 1/32. That's going to be a challenge. I will also be installing the seal kit.

Wednesday, December 2, 2015

A Major Milestone: Off to Paint - build time 1290 hrs

    Today was a major day in the build. The wings, vertical stabilizer and rudder, horizontal stabilator and trim tabs and flapperons all went south with Juan to T&P Aero for paint. I may not see them again until they are painted but after painting the Cessna this year chances are that I'll be down there at some point making a decision or just checking things out.
    Building has been a bit slow as I had to jump around to get the parts ready for paint. The Flaperons needed to be rigged to the control arms and once they left the living room they weren't going back which meant they were in the way and had to be moved in and out of the shop to work on anything. Also, I put in the skin doublers and had to finish out the wing tip lights but I managed to get all that done while working through the wheel fairings. I'm pretty much done with the mains and close on the nose fairing. Fiberglass work is messy and takes time to get it right.
    Once the nose fairing is done I'm going after the canopy. I hope to finish that over the Christmas break and should be able to as long as I put in solid days. Only the cowl and the tank remain after that but there are always little things that need attention now.
These rivet needed to be filed down after being pulled.
Here's a shot before filing. The forums had lot's of folks that ran into this. Looking at the length of the rivet I suspect it's too long for the job thus the mandrel is breaking outside of the rivet.
Wing doubler attached.
Tip lights attached and ready for paint.
Packing up everything for the drive down to KSNS.
Close it up. I hope it doesn't take a spill. That's more than a years work in there.

Sunday, October 4, 2015

Gear Down and Locked - build time 1223 hrs

The little bird finally has legs. It's taken some time to get the section ready for assembly since I'm doing both the gear and the fairings at the same time and need to plan it all out. Now that it's on it's gear I don't foresee it back on the saw horses unless absolutely necessary. I need the wheels off the cart for the wing rack so I can do the last bit of finishing on the wings and rig the flaperons. Once that's done the wings and tail will go off to paint and over to the hanger for storage. Of all the parts only three big sections after I finish up the gear - tank, canopy and cowl. Then we buy the engine.

It's nice to see it on the gear as it really looks like an airplane now. The down side is there are more and more places where you have to skip around to streamline the process and not take stuff apart to finish up the things you couldn't do earlier. I've marked the manual extensively on the stuff that needs to be revisited but I think about it a lot. There's still quite a bit of hardware from the fuselage kit but I'm hopeful it will just disappear as I work through the book.


Sunday, August 30, 2015

Section 33 mostly complete


It only took a day to work through most of section 33. There are a couple small items yet to compete and pretty much all of it will come back out for various reasons but it was time to put in all the panels and get the interior installed. I was a bit concerned about the velcro and its glue as the directions say that removing the tape activates the glue and I didn't want this stuff sitting around for too long. In any case it's fun to sit it the plane get a sense of it. It's really coming along. Next steps are to finish out the last few bits of interior in the baggage area and then get it on it's gear. After that it's the canopy and fuel tank and I'm pretty much out of big projects and ready for the engine.

Progress...


Friday, August 28, 2015

Sections 10, 11, 12 and most of 32 complete - build time 1182 hrs

From start to finish this took nearly a month calendar time to complete. I had put off the fiberglass and never attached the tail feathers before so there was a lot of detail to work through. I managed to complete all of it by only installing the stabilator and rudder twice. I removed it to drill and rivet the nut plates on the tailcone. It could have been done with those parts installed but it comes off and on pretty easy and using the super glue for the washers is the trick. There's no reason to over think it. I will have to be mindful when attaching the stabilator at final assembly to make sure I don't scratch the paint. I also had to carve off an eighth inch on the right stab skin for clearance so having it away from the other parts was a good reason to remove it.

The finish came out perfect. I don't see any reason why it won't go back together and line up perfect again. I was surprised at how well everything came out given that I had to carve, shape and sand so many times. That's really what took so long. I wasn't going to be happy with good enough and the time was worth it. I still need to drill the flapperon tubes but that will have to wait. It's a two man job and I want the plane on its gear so I can use the wheels from the set up it's on now for my wing rack. Once the wings go back outside they will stay there until the painter comes and picks them up. When they are finished with paint they'll go to the hanger.

A note to any builders reading this. Drill out all powder coated bolt holes. The instructions tell you to do this in a couple places but they will all need it.

On to the interior.
Last look before it comes apart and off to paint.
Everything works - gaps are to speck - finally complete.
The Stabilator has perfect balance. If I set a couple keys on the tail it will drop.
This fairing was so much work. Taking off - filing - putting it on again. Maybe 30 times including the times before the screw holes were drilled.

Sunday, August 16, 2015

Sections 11, 12, 32 and some of 10

I put off attaching the tail feathers to the cone because I didn't want to take it on and off and it couldn't be stored that way. Now it's time to work through all the various parts of the different chapters and check for clearance, create the fairings and make sure everything is complete. The tail cone fairing is slow going. There is so much trimming, sanding, checking - rinse and repeat. I'm at the point where I'm making sure the stabilator can rotate with an eight inch clearance and it's rubbing. The forum has some thread where everyone runs into this and they are generally shaving down the aluminum on the stabilator. Before I read that I marked up the fairing to sand it some more and make it clear all the moving parts but I didn't do anything with it yet. It would be much easier to just file the  stabilator so tomorrow I'll call Vans and see what they say. In any case it's slow going right now, three weekends in and still not finished. If I decide to just shave the aluminum I should be able to finish it in one day.
Really starting to look like it will fly.
Sand, assemble, measure, test, disassemble, repeat...
Very happy with how the AST tab turned out - everything lined up. Pretty sure this is the first time it's all been together although I may have put the hinge pin in once.


Sunday, August 2, 2015

Section 32 - Controls -

Still working though the rigging and controls. The rudder is finished and up next is the stabilator. I'll need to finish the fairing first and then install per section 11. After that it's pretty much just make sure it goes the right direction and no cables are crossed since it will be coming off once everything is checked out. I still need to finish the wing rigging but I'll need help to get the wings back on the plan for that part and that won't happen until I have the tail feathers finished and back off the plane as it's too big to move through the door.
Nice shot of the rudder - it's pretty tall now.
Officially an airplane - everything is hard to get to now.
Rudder links ready to go.
Waited a long time to see this. Will be nice to see it with the stabilator weight inside the tunnel.

Sunday, July 26, 2015

Section 32 - Controls - build time 1121 hours

Deep into the section for installing the controls. It's going very slow as most of the stuff is hard to reach and difficult to see. It would be very difficult for a large person to do this work and I've seen some folks turn the hole thing on it's side for access. It would make sense but I'm not sure how well the side would support the structure and I don't want to see it fall to the ground this far along. I assume I'm doing what everyone does - going slowly, cussing and hitting the hot tub to work out all the kinks. I had hoped to blow through this section but everything needs attention. There was powder coat in some threads and other threads the clad is so thick that the bering will need to be run down it or I'll have to buy a die and chase the threads. Also, this section expects that section 12 be completed at this point. Section 12 is attaching the tail feathers and it would like to see section 11 completed which is all the faring work on the empennage. I put that off since I didn't see any point in attaching the rudder and stabilator until needed and that time has come. It will be nice to look at but I don't think I can leave the stabilator on in the shop. It's 8 feet wide and that's pretty much all I have.
I also shot some gloss black paint on the panel and the flap handle. If you want to get good at painting use gloss black and if you want to make sure you have no orange peel don't start with any in the primer. This is the second attempt at the panel and the third at the handle. The first attempts had lint in them and I cleaned everything and tried again and it came out acceptable. If I do it again I won't
 do black. While painting I bumped into the flap handle so it had to be sanded and painted again. It turned out pretty nice. I'm using SW JetGlo which is pretty high end urethane and as always - don't breath any of this crap.
The handle came out nice. Here is the mixer horn - not too hard to install but the bottom washer was a bit of a hassle.
Another shot of the mixer horn.
The bottom bolts were a real pain. They have steel washers that don't fit until you gently spread the fork apart. It takes two hands and you have to hold the control stick still with your feet. I used a big piece of foam to stabilize the handle. The second one went in quicker than the first.
Gloss black. It's looks pretty good. At one point before repainting I tried to rub it out and that gave it a different but kind of cool look. While sanding it for the second attempt it also took on a cool look as it looked distressed. It would be nice to do an entire cockpit distressed.

Sunday, July 12, 2015

Section 30 Complete - Wings attached

Needed to remove some of the bottom skin to account for the doublers.
Today a couple friends came up and we finished up section 30, wing attach. Since I made the spare pins while wiring up the plane it was simply a matter of sliding them in far enough to see that the opening in the side skin needed to be opened up. Once we could slide both wings in and pin them the bottom skin needed about an 1/8 to 3/32 removed due to the side skin doublers. My kit came just about the time when they issued that SB so perhaps newer kits don't need as much trimming. We also attached the flapperons but I didn't shave anything off of them. I need to rig them first to see what full up deflection is. Once that's established we'll trim them out if needed. There's about two or three big days with the wings before I send them off for paint and store them in the hanger. I need to attach the SB doubler and I want to prime under the nav light. I also need them to do the rigging. The project is starting to jump around a bit now but it should all work out. Next day spent with the project will be getting section 31, 32 and 33 primed.
This _is_ my happy face. I sure do look like my father.
Baby bird spreads her wings.

Sunday, July 5, 2015

Section 31B - Wired Up - build time 1089 hours

Section 31B - Wiring - is for the most part complete. There's a couple small tasks that involve parts that need to be primed. I also need to see how I'm going to plumb the AOA and Pitot lines from the wing but that will come in good time. I'm jumping  around a bit now as it moves along but the instructions lead you to that and some of the chapters are short (31 was long). I was looking forward to this section and it turned out to be really simple. I could imagine doing this with out a harness and labeling the wires - it would take much more time and planning - but this went pretty quickly. I decided to lace the wire bundles with wax string like we use to do back in the day. It turned out nice but added some time to it. Happy with the progress.
I've gathered the parts that need primer from sections 31, 32 and 33. Those will get primed in the next two weeks or so. That covers the electrical, controls and covers which is needed to lay down the upholstery.

Making progress.
Avionics bay
Tunnel 
Control Area
Fuel Area
Between the two bulkheads

Sunday, June 14, 2015

Section 25 - Empennage Attached - build time 1023 hours

Decided to attach the tail cone at this point in the build. I've been putting it off because it makes the project bigger, will need to be mobile and it's a two person job. A friend wanted to help out so we set a date and I got everything ready. We managed to get the empennage attached but not fully riveted in one day. I followed up the next day and riveted to the longerons. I decided to paint the turtle deck skins white since I knew I really wanted to paint the roll bar.  Everything below this line will be covered with carpet. I think it will work out but I really won't be able to tell until the carpet goes back in - a couple chapters away. There's a thread on vansairforce on saw horses and one guy who found his project on the ground. Since the project is now about 12 feet long it needed to be mobile. I really liked the height I had it at on a couple sawed off wooden horses but the wing attach chapter gives a height so I went with that. Now to do anything to the inside of it you have to climb up into it with a ladder. Pretty much the nature of planes though so I'm really careful and watch where I step. Everything for chapter 25 is complete except for putting in the rear window. The directions suggest waiting until later so it's easier to work on.

The wing attach chapter will have to wait until I have help again so I've moved on to the wiring which I want to really dress up with lacing cord. Not to many big milestones until the engine but it's a lot of detail that should pay off when done properly.
Getting ready to paint the roll bar.
Everything masked off except what will be painted.
The wiring sorted out and accounted for. Been looking forward to this part of the build.

Friday, May 22, 2015

Section 29A Complete - build time 992 hours

Well - almost. I have a few loose ends to tie up, one being to finish sealing the firewall with fuel tank sealant. I made good progress sealing it but the pot life on that stuff is pretty short. I have a few small bottles in the mail and I'll finish that up this weekend. Everything is coming along nicely although I am anxious to make big progress now that all the little parts have been turned into bigger parts.

This week the interior came in. The point of having it done now was to see how much (if any) of the inside I would paint. My main concern was the roll bar. I still may paint it but I think that's going to be it. There's too much primed interior that shows with the kit installed and if I were to try to go over that I may as well do the whole inside. That's more weight, more time and getting all the nooks and corners prep'd for paint would be questionable. The "green death" looks fine - kinda like a war bird. It will have to do. I am thinking about the carbon fiber vinyl for the panel.

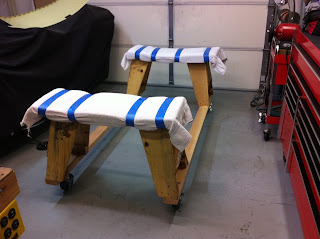
Next steps are to get the saw horses attached to some 2X4's and put them on wheels so the project is mobil. That will happen this weekend. I'll also finish up the fuel system and what ever is left of 29A.

Pretty much says it all. The badge of honor for those that choose to build.
Section 29A laid out and ready to assemble.
Panel and shelf attached along with the engine mounts. 
Everything assembled.
The avionics bay top skin seal after curing. I used three layers of painters tape and leveled that off then screwed it all together and waited a week. This was the second attempt and I'm happy with the results.
Very little stuck to the top skin. I used Harley transmission oil.
Another shot of post cure.
Here's the seal after trimming. It's stuck on there very well and looks professional.
The carpet kit came in - time to play.
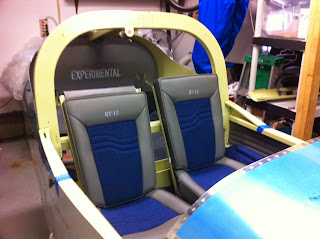
The seats are nice. I opted for leather because I'm only going to do this once and I've never been one to upgrade anything (well except the Cessna)
The goal of mocking up the interior was to see how much I might paint. There's too much so the answer is none. It's going to be warbird primer. I may change my mind when I paint the exterior but I doubt it.
Very happy with flight lines work.
Time to climb in and make airplane noises.
Nice and comfy. That new airplane smell.